Hey guys,
And welcome to Chest Quest December update part 2, where I am going to discuss some more of the changes that I have made during this time, and why these changes have been made.
Where we last left off I discussed RLD and pacing for the levels of my game. So now I am going to show you the first two levels of the game, then state what I like about these levels as well as what needs to be improved upon.
Level 1:
Level 1 to me has been the level so far that I have constantly been working on, iteration after iteration to get it to a standard, which I myself am truly happy with. To give you a hint on how much time I have spent thinking about this, I have edited the first jump alone 20+ times. Please enjoy the video, after we can discuss my design choices.
Level 1 – Video:
Tad-ah level 1 my fellow gamers, hope you enjoyed what you saw. So now to discuss my choices upon this. First point, is that I wanted to keep this level focused around “Jumping” this is the stage I teach the player in a safe, yet challenging area for them to experiment with timing for the jump.
I was really inspired by the design of “Super Mario 3D World” in which they have a four stage method of teaching the player of one mechanic.For a more detailed description of this method please follow this link:
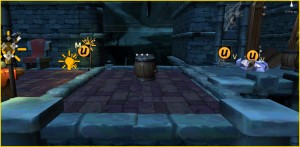
The first area the player has a safe space to learn the mechanic. If they fail they may lose a HP point but never game over. Earlier I mentioned about how I changed the first jump 20+ times, well originally the first jump was a jump between platforms, it was not a long jump at all but after testing sessions I noticed players did fail which was Death. Now dying + restarting from this first jump just felt too harsh of a punishment on the players. So this is why the first jump is a set of barrels, this way if they hit the barrels they lose a HP point but can still continue.
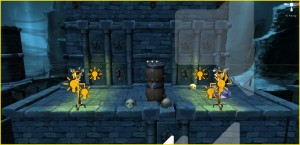
I found that making this change players got further into the level, as well not feel to beaten by the game which made them feel more comfortable in restarting the game. After this is there are a few more barrels which are spaced closer together which increases the player’s awareness as well as their reaction time. This to me is now the second stage of the jump mechanic as if you miss time, the jump too often it can result in failing the game, because the last jump is now to another platform which has a bigger risk to the player.
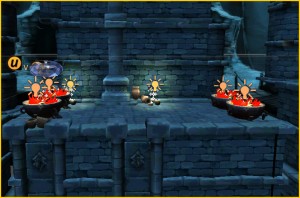
Obstacle placement on platforms is something I spent a long time investigating. As the platform sizes can range from long run ways to short instant jump platforms. I did some RGD to state that if the platform is a certain size it can’t have any obstacles or it can only have them at the begging/end of the platform or just one in the centre.
Mid-Length Platform variation 1
Mid-Length Platform Variation 2
With this set up it allows me to get a few variations from the same length platforms.
Then we move to the third stage of the jumping mechanic which is shooting spikes at the player.
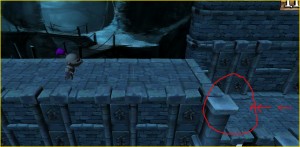
(Quick side note, on what needs to be improved here. When the player is running upto this part of the level I want to show one of the spikes hitting the wall so players can see this and know whats coming. Signs and feedback on this obstacle as well such as sound once fired so player again are aware of what is coming their way.
Once the player reaches this area the spike would fly in and crash into the wall, where the red circle is.)
Flying spikes now puts a twist on the jumping, as players have been jumping over static objects, as now the objects are moving. Now they have to time their jumps and wait to see when the next spike fires.
The final challenge of the level is the rapid fire of jumps to reach the end of the level. Which is a switch of pace compare to the spikes. Which in comparison is forcing the player to switch to rapid jumps. Instead of waiting then reacting to the challenge, they must react instantly.
Last thing I want to say about level 1, is the positioning of the orc at the end of the level.
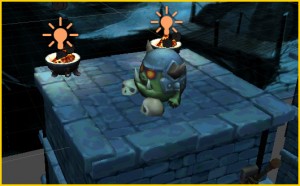
He is placed in the middle of the platform, the reasoning is so the player has a high chance of landing on the orc, roughly no matter when players jump. This way it teaches players how to kill these enemies, which teaches the player that they can earn extra points by killing enemies.
Level 1 Conclusion:
Those are my thoughts on level 1, what I like, and the reason it is laid out in this specific way. Some areas which need to be improved upon. Once I have finished upon the signs and feedback on certain elements of the game I am going to give it its, final round of testing before I sign off. I do feel this level is close to completion.
Level 2:
In this level I am re-enforcing what the player has learnt with the jump mechanic, yet introducing and teaching the charge mechanic. This is the second mechanic which the player unlocks within the game that allows the player to smash through certain objects, blocking their path. It will also be used within combat as well to kill specific enemies, just like the orc I intend to have enemies which can only be killed the charge mechanic.
Level 2 – Video:
Hope you enjoyed the look of the level, if you have any feedback I will put my contact info at the page so please get in contact.
The level flow is something I really like, I feel that it has a nice pace and increases the difficulty from the first level. I chose to not give “rest platforms” as I wanted to mix the challenge of jump and charge in one frantic level, it may be shorter than the first but is at a much faster pace.
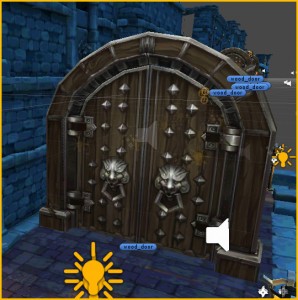
Currently the only thing that players smash through is a wooden door, which is nice as I am hoping that it teaches players that wooden objects can be smashed through.
However this level does not really match the design philosophy of the first level as there currently is no twist on the charge mechanic. As mentioned earlier I want to incorporate the charge into the combat with a certain type of enemy which you have to charge to destroy.
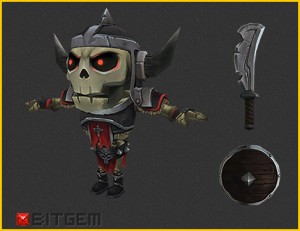
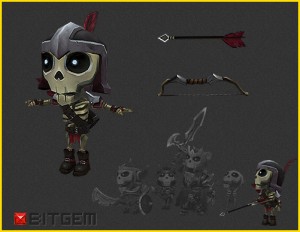
These two are the types of enemies which I am thinking of using:
1) The Skeleton Warrior who I would make patrol a platform as players have to time the charge correctly to attack and destroy him.
2) Skeleton Archer who would be static yet fire arrows at the player which they have to doge until they are close enough to smash through.
These are just ideas I currently have, so once I have made a choice I am sure I will go into more detail of the combat as well as a video showing the final result.
(Art and animation for these characters will be provided by the amazing studio of BitGem, they have supplied a lot of the art for the game already. Amazing people with some incredible work.)
Level 2 Conclusion
Overall I am extremely happy with the frantic flow of the second level, as it ramps up the difficulty of level 1 as well providing a different feel to the game. This keeps players on the edge of their seat, which gives them a quick introduction into the mechanic. Feedback from testers seems to be mainly positives, they like how it combines two mechanics. Making the game have more depth to it. Players do want more than just a door to charge through.
I need to make the sure that it matches the design philosophy of level 1, so I am going to add the twist by adding in the new enemy within the near future.
Overall Conclusion
I am proud of what I have produced and believe that the constant iteration that my levels have gone through has only strengthened them. Sticking to this 4 step flow philosophy has increased the quality of my levels. For this blog I was planning to show the third level as well, but I think this post has ran on longer than expected. I want to make some changes to it, which will improve the level. Level 3 is a really enjoyable which just lets players master the mechanics from the previous two levels.
Thanks guys, any feedback please contact me on
Twitter: @MaxPears
Email: maxpears010@gmail.com

